

EDUCATION

How To Drain Your Irrigation System
Hi, I’m Stephanie from Timberline Landscaping, and today we’re going to give you a brief tutorial on how to drain your irrigation system. This time of year, it’s very important to drain your irrigation system overnight when we get freezing temperatures. It’s going to help protect the portions of your irrigation system that are above ground. You can still turn your irrigation system back on during the day when temperatures warm up to keep the water going to your turf areas and other plant materials.
We’re going to start out inside of your house with how to turn off the water to your irrigation system. So here we are inside of the home. We’re going to turn off the water; that’s our first step. It’s going to be near to your water heater and other systems. Yours may not look exactly like this but should be similar. So you’ve got your main water shut-off for the house, which would be these valves here. Your irrigation system is going to tee off of that main line. So here’s where our irrigation turns off. You can see that here our valve is in line with the pipe, which means that the water is turned on to the system. So we’re just going to turn that 90 degrees to shut off the water. Since we’ve done it at the tee, we’ve only turned off the water to the irrigation system itself, which is going to keep the water going to the rest of your home.
So for our next step, we are out at our backflow. This is typically going to be on the side of your home. You’re going to have something that looks very similar to this. We’ve got two valves here; currently they’re open. We’re going to partially close them by turning them to a 45 degree angle. We don’t want to close it all the way because we don’t want to block that water in completely. We want to leave room for it to escape and move as things freeze. Next, we’re going to take a dime or a screwdriver and we’re going to turn our test cocks to a 45 degree angle as well. You just want to match it up with the angle of your ball valve. So here we’ve got two of them; you may have more of these that you need to open. And lastly here, we are just going to open our valve at the bottom, and you will see some water escaping to let that water drain out. That means that we now have this prepped, all of the water drained out, so that we’re good to go for a freeze overnight.
So for our third and final step, we’re back at the water shut-off. You want to have a bucket for this step. Right where we have the water turned off, we’ve got a small valve here. Keep your bucket handy because when you open this, water is going to come out. Catch as much as you can in there and just open that valve up. This is draining the rest of your system. So now that the water is flushed out of the system, we want to make sure we put this cap back on here nice and tight.
So now that your system is drained, it’s protected from freezing temperatures overnight. Here in Colorado where we are, it’s still very important to have your system blown out before we get some of those harder temperatures over the winter. That’s going to make sure that you’re protecting your pipes that are under the ground when that ground starts to freeze. For us, we recommend doing it around the middle to end of October to ensure that you protect your entire irrigation system. Thanks so much for joining us for how to drain your irrigation system.

Freeze Damage To Trees
My name is Elle. I’m with Timberline Landscaping, and I’m the arboricultural manager. Anyway, we had another major freeze event. Back on October 10th of last year, 2019, we had a dramatic temperature fluctuation where the temp went from 70 degrees down into the teens, and up north in northern parts of town got into the single digits. So a lot of trees and shrubs and even evergreens, and in this case roses, were dramatically affected by this temperature change where the water in the vascular tissue went from 70 degrees to expanding and freezing and blowing out those cells, and that prevented the plant from getting any water.
So what we’re recommending is to cut all the dead out of these plants. And as you can see here, there is some rejuvenation where it is starting to green up out of the base. So that’s what we’re really trying to encourage by rejuvenating it. Then watering and fertilization are a couple other things you can do to help kind of kickstart the plant to have it start growing again.

Winter Watering
With some preparation, you can minimize and even prevent hail damage to your plants. Fertilizing can give your plants some extra strength, and strong plants are hardier against physical damage. Before summer hail storms hit, be sure to fertilize your plants properly. Being proactive is important. Gather any materials you might need ahead of time. June has some of the heaviest hail storms. If hail is in the forecast, move all of your potted plants and hanging baskets indoors or undercover. Put the hail covers on your plants in place. Make sure that they are weighted down and sturdy enough to handle high winds.
Sometimes hail storms are so unexpected that there isn’t time to prepare. After the storm is over, take some time to assess your plants. Remove broken branches, stems, and leaves so that the plant can focus on healing. Give your plants some time. Healthy plants can recover quickly from damage, so be on the lookout for new growth. Damaged plants can be more vulnerable to insects and diseases. Fertilize your plants to give them the extra boost after a damaging hail storm. Be sure to water your plants correctly after a hail storm. The mounting hail will provide water for your plants, and overwatering them afterward can be more harmful than good. Hail storms can be hard on plants, but with a little preparation and aftercare, you can have a lively and healthy garden.

How Often Should I Mow?
How often you mow your lawn isn’t as important as how much you cut. We recommend never cutting off more than a third of the grass’s length during a single mow. The most common lawn grass in Colorado Springs is Kentucky bluegrass. It is a drought-tolerant cool season grass. It is most likely your lawn type. This grass thrives between two and three inches tall and should not be cut shorter than two inches.
Cutting grass too short can result in shallow roots and increased weeds. Longer grass is more drought and disease resistant and will out-compete weeds. Longer grass is easier to maintain because the root system will be well established and deeper. Stick to a schedule and mow more often during the grass growing season. If you miss a mowing and turf is allowed to get too long, don’t take more than a third of the blade in one cutting. This can be achieved by lowering your deck incrementally to get back to the desired height over a several day period.
Cool season grasses’ peak growing season is during the spring and fall. Mow more often during peak growing season, with an average of about once per week for Kentucky bluegrass and other cool season grasses. Fertilization and watering frequency can increase the growth of your grass, causing the need to mow more frequently. Avoid mowing your lawn when it is wet to prevent damage from soft soils which are easily rutted.
If your grass looks unhealthy after mowing, the blade setting on your mower might be too low, causing scalping which will expose the crown and soil to excessive heat. Your mower blades may be dull, causing a tattered leaf or yellow appearance. Take care, prepare, and enjoy a healthy, lush lawn.
Tree Wrapping
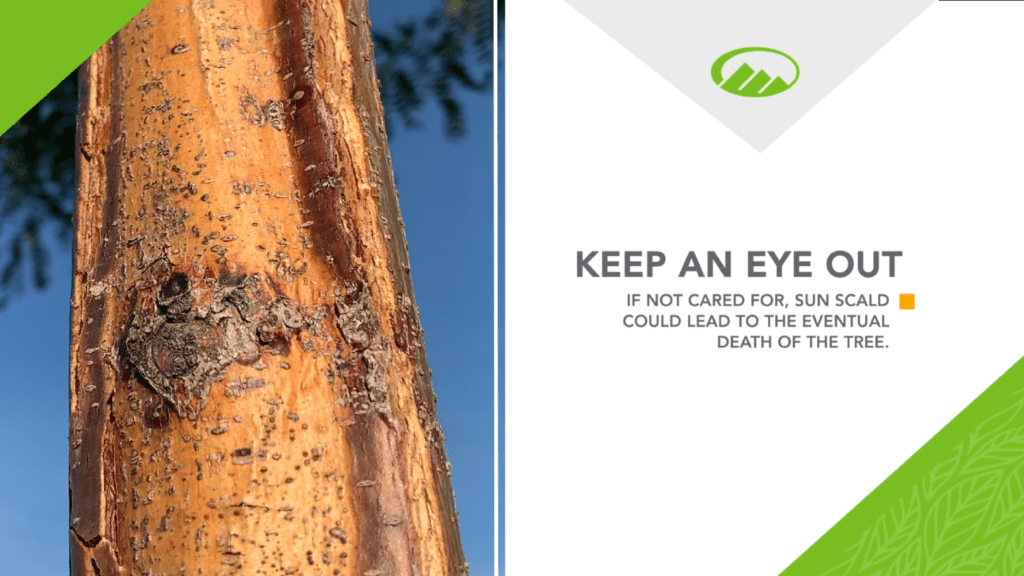
Today we’ll discuss the importance of wrapping a tree in the winter. Sunscald happens on the south-facing side of trees in the wintertime. The warm sun can cause thawing during the day and the cool nights can refreeze the plant cells. This can cause them to burst and result in cracks in the trunk. If the tree gets damaged, it’s essentially an open wound that can lead to insects, diseases, and cause nutrient and water disruption. If not cared for properly, it could lead to the eventual death of the tree. We wrap in October and November and remove the wrap by the end of April. Leaving tree wrap on during summer months can lead to an increase of insects and diseases.

Hail Damage Mitigation
With some preparation, you can minimize and even prevent hail damage to your plants. Fertilizing can give your plants some extra strength, and strong plants are hardier against physical damage. Before summer hail storms hit, be sure to fertilize your plants properly. Being proactive is important. Gather any materials you might need ahead of time. June has some of the heaviest hail storms. If hail is in the forecast, move all of your potted plants and hanging baskets indoors or undercover. Put the hail covers on your plants in place. Make sure that they are weighted down and sturdy enough to handle high winds.
Sometimes hail storms are so unexpected that there isn’t time to prepare. After the storm is over, take some time to assess your plants. Remove broken branches, stems, and leaves so that the plant can focus on healing. Give your plants some time. Healthy plants can recover quickly from damage, so be on the lookout for new growth. Damaged plants can be more vulnerable to insects and diseases. Fertilize your plants to give them the extra boost after a damaging hail storm. Be sure to water your plants correctly after a hail storm. The melting hail will provide water for your plants, and overwatering them afterward can be more harmful than good. Hail storms can be hard on plants, but with a little preparation and aftercare, you can have a lively and healthy garden.

Cycle & Soak Irrigation
Cycle and soak divides watering your lawn into three watering sessions. Typically, you will water until you see runoff to determine length of watering time per cycle. Note that the type of soil you have and head types all affect the cycle length. The first watering session is to break the surface tension of the soil and allow the water to penetrate. After the first session, wait 30 minutes before the next cycle. The second cycle is absorbing further into the soil, reaching the roots. After the second session, wait 30 minutes before the final cycle. The third cycle allows for additional absorption, filling the root zone. The goal is to allow the water to soak down 6 to 8 inches into the soil. This promotes the growth of deep roots, which ultimately creates stronger, happier grass.

Aerating Your Lawn
Aeration is a process of removing soil cores or plugs from your lawn by extracting them from the lawn surface. Aeration creates small pockets in your lawn that allow more water, oxygen, and fertilizer to penetrate into the soil, which leads to healthier grass. Some of the signs that your lawn might need aeration are spots near the lawn or stunted growth, high traffic on your lawn from kids or pets, standing water, or excessive water runoff. This can also be aided by cycle and soak irrigation.
Before you aerate, mow your lawn about one and a half to two inches above the ground. Water one to three days before aerating to ensure moist soils. Be aware and mark where your sprinkler heads are. You can use a hand aerator or an aeration machine to go over the lawn. Longer tines at least four inches on the aerator allow the water and fertilizer to penetrate deeper. Proceed in two different directions. The aerator will pull small plugs from the lawn. Make sure that your aeration method pulls the plugs out as opposed to just pushing the dirt down further. Be sure to leave them there so they can break down and return nutrients to the soil.
Aerate your lawn annually if it has moderate usage. High use lawns may require aeration twice per year, once in the spring and once in the fall. For cool season turf like fescue, bluegrass, and ryegrass, aeration is recommended in the fall. These are the most common varieties in Colorado Springs. For turf such as Bermuda, buffalo, or St. Augustine, it is best to aerate in spring or early summer.
Make sure you check the weather before you aerate. Avoid dry periods, heat waves, and cold snaps. Avoid excessively wet or muddy grass. Wait to aerate your newly seeded or newly sodded grass for at least a year. If you have any questions, call a Timberline expert.
Residential Landscape Designs
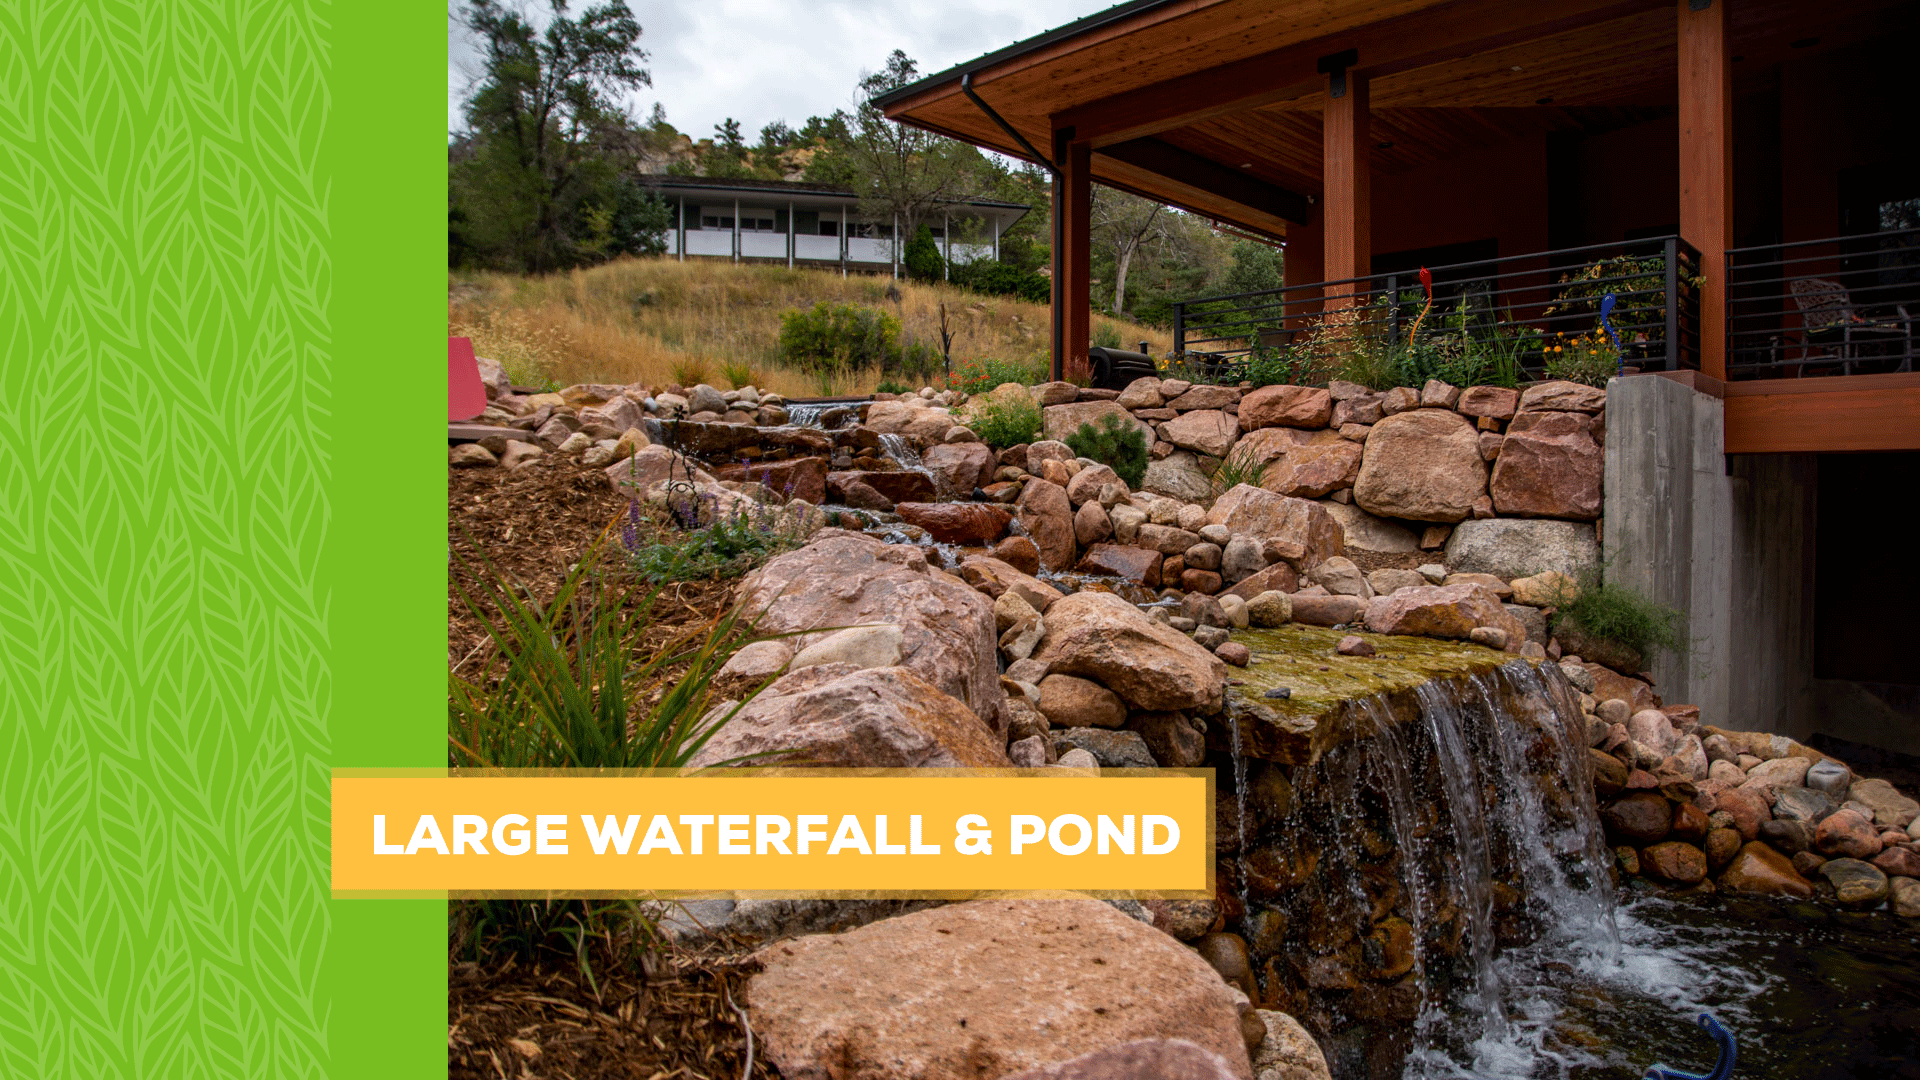
Large Waterfall & Pond

Landscaped Front Drive

Front Xeriscaping & Retaining Wall

Raised Garden Beds & Landscape

Patio, Xeriscaping & Turf

Stone Water Feature

Flagstone Patio & Dry Creek Bed

Retaining Wall, Native Grass & Trees

Native Grass, Turf & Retaining Wall

Siloam Stone Steppers
Christmas

Using the Christmas Lights Guide
Where can you view the best Christmas lights in Colorado Springs? Timberline Landscaping’s annual Christmas lights guide is an interactive map featuring hundreds of the best lit homes and businesses all over town. It’s a great way to spread joy with your family this season. From your device, go to timberlinelandscaping.com/colorado-springs-christmas-lights-guide, or you can find it easily on our home page.
The guide features an interactive map, a Spotify playlist, and a fun scavenger hunt for your kids to do while you’re out touring the lights. To zoom in, take two fingers and spread them apart. To zoom out on an area, take two fingers and pinch them together. Consider viewing on a tablet for a larger screen size. If you want to look at information and details about a property, just tap the icon. It’ll tell you property highlights such as what times they’re lit, if you need to tune into a radio station, or if they’re only lit on the weekends.
The map has a key that’s broken into three main categories. If you love computerized light displays, look for the blue light bulbs. The purple light bulbs represent properties lit by Timberline Landscaping. All of the red light bulbs are all the other fun festive lit homes and businesses submitted by homeowners all over town. And last but not least, the coffee mugs. While you tour, be sure to stop at any of the coffee shops located all over the map where you can pick up a hot cocoa or a nice chai to enjoy while you drive around with your family.
Want to submit your home or business to be included on the lights guide? Hit the “Submit Your Home” button about halfway down the page. There you’ll also find a great collection of some of our favorite properties from all around town. Thanks so much and happy driving.

Timberline's Christmas Décor Facility Tour
Hi, I’m Sean Brewer and I’m the decor manager here at Timberline, and we’re going to take you out to the shop and kind of show you how things go and how we get things prepared for the holiday season. Let’s go.
This area right here, this is the Christmas domain if you want to call it. This is where all the magic happens. All these totes that you see are different jobs and different material that we store indoors. Of course, we like to store all of our boxes in these tough Rubbermaid totes. We put all of our garland and bigger items in the yellow totes here, and then we have them on shelves. We have our shop guys who have maps built out so we know exactly where each job is and how many totes are on each job. So for instance, if you look at this right here, Compassion International, that’s three of six, so we know we need to have six totes before leaving the shop here in the mornings.
Once we get new jobs and old jobs, every single job has gone through to make sure lights are good, quality of everything’s good, and everything’s just generally safe and looking good for the holiday season. After our shop goes through it, we bring it over here and we kind of just line it up right here. Normally we have a nice wall here, and the guys, this is what they take and they kick out from their trucks each morning as they grab the paperwork. We got Nacho building life, you got Sonny here working on garland, making sure that it’s ready to go.
One thing that we like to hit on is safety. I do lots of trainings throughout the year before the season even starts, and we’re currently doing training as the season goes. Harnesses, ropes, ladders, we do it all. We’re able to kind of use all equipment, but it is very key that we have harnesses and that we are tied off to these roofs that we’re on, especially during the cooler season when there could be a little moisture on the roof.
So each year as we’re planning and moving along, we always buy stock. So some of this stuff as you see here, this is stuff we have in stock for jobs that may come on, and also some of this stuff has already been spoken for on jobs that I’ve already sold. So we are constantly having pilots and freight always coming in with fresh new Christmas items to make your house look delightful.
This little section here is kind of where we keep all of our hardware. We have all of our different colored bulbs, and no, that’s not all we have. Of course, we got all these blocks here are actually all of our balls that we have, and plus we have more coming in. So organization is key, especially when we have good weather. Sometimes the guys might just be knocking jobs out and getting them done a little quicker than I depended on scheduling.
So over here as you can see, we have five trucks. Normally we have four with two bucket trucks going, but this is where I kind of put all their information each day so they can come over here, grab what they need, and then they can look at the sheets and confirm that everything’s been pulled and ready to go before they load it on the truck.
So not only do we do roof lights and tree lights, but we also offer honestly anything from ornaments in your yard to greenery, wreaths, garlands, whatever it is, we offer that. Now I know it’s a little difficult to see, but we got wreaths that kind of grow in size from anywhere from 36 inches all the way up to 96 inches. Other options that we have is if you just want a daytime decor or you don’t have a power source in certain areas, we definitely have the capability of having unlit garland, unlit wreaths. We can put picks in them which consists of berries, nuts, pine cones, things like that, along with the bow that still had that elegant touch without having to have power or lights.
So I have you guys here, I just wanted to touch base on our trees. I really think that’s something that my crews and all of us really love to do is decorate these trees. A little bragging here, but our company out of all the decor franchises won the best decor trees in 2020, so that’s something we kind of hang our hat on. So it’s always, I understand people are always looking at trees, but it’s always great to give us a call because we’ll just add that little extra touch to make sure that the tree really pops.
So after lights are installed, when we get one of those crazy winter storms or maybe a little bit of wind, or maybe you just got a pesky squirrel, maybe you’re wondering what happens if your lights go out. But we got a dedicated team that will make it out there to do any service calls that are needed, whether it’s repairing a whole strip of lights to one light bulb, to maybe just repairing a chewed end on the wire. We got a service guy that’s here to do that, and we will also double check all of your lights throughout the community, making sure that they’re lit and looking good for Christmas.
Thank you for coming on this tour here at Timberline. I hope that it’s opened your minds up for decor and kind of what the options are out there. I know the holidays can be very stressful with everything going on, so let us take that stress away from you and bring a little spirit to your house. Also, don’t forget to check out our life’s guide.

Tree In A Box
Tree in a Box. It can go where you want it to go. It can go by your fireplace. It can go by a large window. It can go in your boss’s office. It can even go in an elevator. But it shouldn’t go outside; it would get cold. Wherever you decide to put your Tree in a Box will be in and out in the blink of an eye.
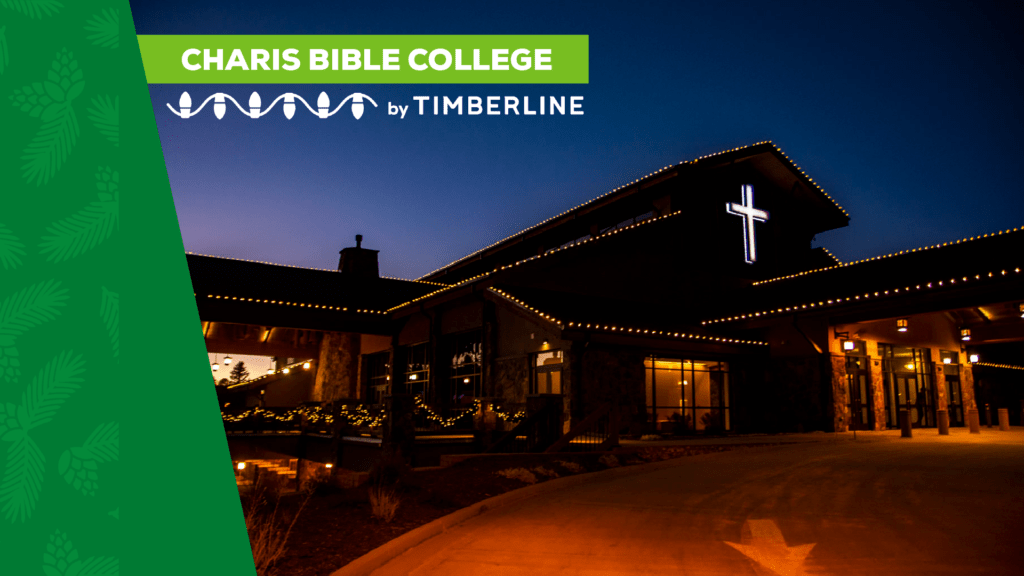
Charis Bible College Décor

City of Manitou Décor

First & Main Town Center Décor
Company

Timberline's Family of Companies
Timberline Landscaping is proud to share our new look and introduce our family of companies. Timberline is more than just landscaping. Via our new parent company, Timberline One, we’re here to serve you through Timberline Landscaping, Timberline Rock and Roll, Timberline Trail Craft, and Timberline Building Systems. We recently moved into our new headquarters, providing a space for our growing team and entities. You’ll find that our team remains committed to the quality, knowledge, and community service that you’ve come to know since we started landscaping in 1982. We are Timberline Landscaping, where we imagine, build, and maintain your little piece of heaven.

Timberline's Grand Opening

The History of Timberline
Timberline has a rich history comprised of hard work, dedication, and growth. Timberline One is the parent brand to all Timberline companies. Timberline Landscaping was founded in 1982 and is the origin of Timberline, with a history of award-winning design and build projects, full maintenance for commercial and residential properties, snow removal, and Christmas decor in the winter. Timberline Building Systems is a commercial general contractor and dealer of pre-engineered steel buildings; they are behind the construction of our beautiful headquarters. Timberline Rock and Roll is a wholesale landscape and construction aggregate supplier and trucking provider. Timberline Trail Craft prides themselves on building trails of all types for diverse users in Colorado and beyond.
Our founder, owner, and chairman is Tim Emmick. It is not unlikely to see him around intermittently working on projects and visiting job sites. Next, we have our Timberline One C-suite that oversees all of the companies. Judd Breirley is our Chief Executive Officer, Stephanie Earley is our Chief Strategy Officer, and Craig Nesbitt is our Chief Financial Officer. Each individual company has a Chief Operations Officer to preside over management. Josh Poole is the CEO of Timberline Landscaping, Scooter Hallstrand oversees Timberline Rock and Roll, and Tony Boone leads Timberline Trail Craft.
Timberline Landscaping was founded in 1982 with four employees providing residential services only. By 1994, the company had its first million dollar revenue year. In 1997, a large blizzard hit Colorado Springs and Timberline began snow removal services, which diversified our offerings beyond seasonal work. Beginning in 2001, Christmas Decor by Timberline aided in further support of year-round work. That year, the company also hit 5 million dollars in revenue. 2006 is when Timberline started obtaining the first Certified Landscape Professional designations. That year, a benchmark 10 million in revenue was earned. By 2014, the company reached 115 employees. In 2015, Timberline Landscaping earned five awards from the National Association of Landscape Professionals. The location we are in today was purchased in 2016. In 2017, Timberline Building Systems was formed. Timberline Landscaping earned 15 million in revenue and became NALP accredited; it is one of the first three companies to receive that accreditation. Timberline Rock and Roll was formed in 2018. That same year, Timberline Landscaping earned an additional award with NALP, and Christmas Decor was also awarded Veteran Franchise of the Year. In 2019, the company started the tree care unit and formed Timberline Trail Craft, which had been operating under Landscaping since 2007. That year, Landscape Management Magazine recognized Timberline Landscaping as number 128 out of 150 top landscaping companies in the U.S. In 2020, Timberline Landscaping jumped to 115 out of 150 as ranked by Landscape Management Magazine. We moved into our beautiful new headquarters, which enabled all of the Timberline One companies to operate together. We are looking forward to a bright future, cultivating better places to live, work, and play.